Big Walk Green Tower Puzzle Solution
The Green Tower uses a light-and-bridge mechanic: you route a green beam onto a receiver to extend a bridge. The Big Walk Green Tower solution is to aim the beam at the near receiver first (extends bridge 1), cross to the middle platform, then rotate it to the far receiver (extends bridge 2) — never both at once. It is a routing puzzle, not a timing challenge.
Overview
The Green Tower swaps the pressure plate for a light beam. Instead of weight, you route a beam to receivers that extend bridges. The catch is the beam only reaches one receiver per angle, so the whole Big Walk Green Tower puzzle is about the order you light things in, not speed. The fastest clean route is always the same: near receiver, cross, far receiver, cross, exit plate as a full line.
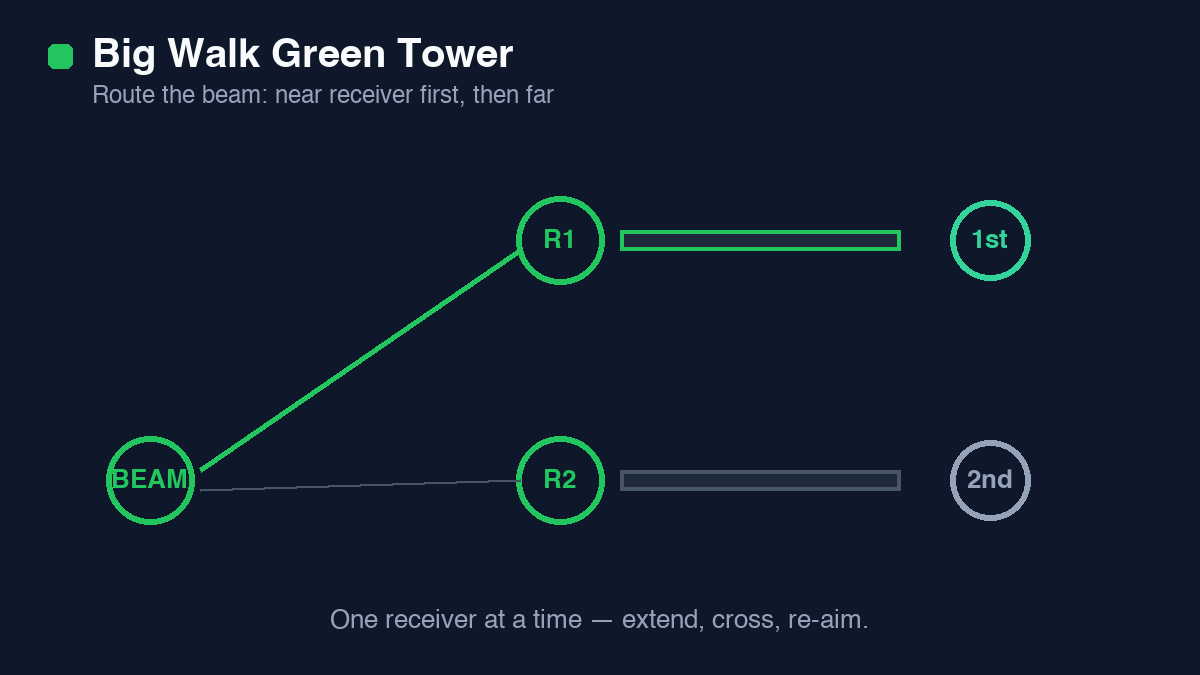
How the beam and receivers work
A reflector at the tower base throws a green beam across the gap. Two receivers sit on the far side — a near one and a far one — and each receiver powers exactly one bridge. While the beam touches a receiver, its bridge stays extended. The moment the beam leaves, that bridge retracts.
The reflector rotates, but the beam is a single straight line. It can lock onto one receiver per angle, never both at once. There is no timer and no drain: a receiver holds for as long as you keep the beam on it. That is what makes the Green Tower a routing puzzle rather than a reflex test.
You will know the beam has locked when the receiver lights up and the bridge slides out with a solid thunk. A near miss still looks close — the beam grazes the edge and nothing extends. If a bridge will not come out, trust the bridge, not your eyes: nudge the reflector until the receiver visibly catches.
What the receivers actually power
The near receiver extends bridge 1, which runs from the base to the middle platform. The far receiver extends bridge 2, which runs from the middle platform to the summit. Bridge 2 is only useful once your group is standing on the middle platform — lighting it early gives you a bridge nobody can reach.
The two-bridge order and why both never stay up
Players try to light both receivers and wonder why the first bridge drops. You extend one, cross, then re-aim. It is a sequence, not a simultaneous solve. Because one beam feeds one receiver, holding bridge 1 and bridge 2 together is impossible by design — the tower is built so the group commits to each crossing fully before starting the next.
The safe rhythm is: lock the near receiver, walk everyone across bridge 1, then deliberately swing the beam to the far receiver. Bridge 1 retracting behind you is not a failure — it is the mechanic working. Once bridge 2 is up, cross it and stack the full line on the exit plate.
Who should control the reflector
One walker controls the reflector; the rest stay put until told. Pick the controller before the run starts and say it out loud in voice chat. The ideal controller is whoever is calmest about standing still — the job is ninety percent holding an angle and ten percent rotating on cue.
The controller crosses last on each bridge, after everyone else is safely over, and re-takes the reflector on the middle platform for the second aim. Nobody else touches the reflector mid-run. Two players fighting over the rotation is the single most common way a clean Big Walk Green Tower solution falls apart.
Everyone else has one job: call crossings. A simple "over" from each walker tells the controller the bridge is clear to drop. Silent groups make the controller guess, and guessing is when beams get moved early.
Common routing mistakes
- Aiming at the far receiver first. Bridge 2 starts at the middle platform, so from the base it is a bridge to nowhere.
- Moving the beam while someone is mid-cross. If the beam drops, the controller re-aims before anyone moves again.
- Sending walkers across one at a time with long gaps. Cross as a group so a single re-aim never strands half the line.
- Walking off the exit plate to "help" a straggler. The exit plate only registers with the full line present, so wait for the last walker instead.
- Panic-rotating after bridge 1 retracts. That retraction is supposed to happen — keep the beam steady on the far receiver.
Tips for a clean run
- One walker controls the reflector; the rest stay put until told.
- If the beam drops mid-cross, the controller re-aims before anyone moves.
- The exit plate only registers with the full line present.
- Treat the Green Tower as practice for reading receiver order — later towers reuse the same one-beam-one-target rule under harsher conditions.
Step-by-step
- Gather at the reflector. Bring the whole group to the reflector at the tower base and agree on who controls it before anyone touches it — swapping mid-puzzle is how runs fail.
- Aim the beam at the near receiver. Rotate the reflector until the green beam locks onto the first receiver. You will hear it catch, and bridge 1 extends from the base to the middle platform.
- Cross bridge 1. The walkers cross to the middle platform while the beam holds. The controller re-aims before anyone moves if the beam drops mid-cross.
- Rotate to the far receiver. From the middle platform, swing the beam off the near receiver and onto the second one. Bridge 1 retracts — that is expected — and bridge 2 extends to the top.
- Cross bridge 2. Everyone on the middle platform walks bridge 2 to the summit while the beam stays locked on the far receiver.
- Finish the climb. Cross bridge 2 and stand the full line on the exit plate to complete the Green Tower. The plate only registers when every walker is present.
Frequently asked questions
Why won't both Green Tower bridges stay up?
The beam only powers one receiver at a time, and each receiver holds exactly one bridge. Lighting the far receiver drops the near one, so bridge 1 retracts. Extend and cross bridge 1, then re-aim for bridge 2 — you cannot hold both.
What is the correct Big Walk Green Tower solution order?
Near receiver first, far receiver second. Aim at the near receiver to extend bridge 1, cross to the middle platform, then rotate the beam to the far receiver to extend bridge 2 and finish the climb.
Who aims the beam in co-op?
Whoever reaches the reflector first. The rest wait on the pad or platform so the beam does not drop, and nobody else touches the reflector until the run is over.
What happens if the beam drops while someone is on a bridge?
The bridge retracts under them. The controller re-aims onto the receiver before anyone moves again, and the fallen walker respawns at the base pad.
Is the Green Tower a puzzle or a timing challenge?
It is a routing puzzle, not timing — much more forgiving than the Black Tower once you see the two-step order. There is no countdown; the beam holds a receiver for as long as you leave it aimed.
Why won't the Green Tower exit plate trigger?
The exit plate only registers with the full line present. If one walker is still on the middle platform or respawning at the base, wait for them before expecting the completion chime.
Can you skip the middle platform by aiming at the far receiver first?
No. Bridge 2 starts at the middle platform, so lighting the far receiver from the base gives you a bridge you cannot reach. The near receiver always comes first.
Related Big Walk guides
- Big Walk Red Tower Puzzle Solution: Step-by-Step + MapStuck on the Red Tower in Big Walk? Full puzzle solution with map location, the anchor-plate walk order, and the bridge trap that fails most runs.
- Big Walk Black Tower Puzzle Solution: Timing GuideBig Walk Black Tower solution: the three-pulse timing gate explained, the exact pulse to cross on, and why groups keep resetting. Step-by-step with diagram.
- Big Walk Blue Tower Puzzle Solution: Step-by-Step GuideStuck on the Blue Tower in Big Walk? Full puzzle solution: valve water levels, the mid-state ledge rule, and the full-drain trap — with diagram.
- Big Walk Yellow Tower Puzzle Solution: Finale GuideBig Walk Yellow Tower solution: the final tower solved bottom-up — plate, beam, then water — plus role assignments and reset recovery.
- Big Walk Tools & How to Use ThemEvery Big Walk tool explained one by one — what each does, when to use it, and the combos that break puzzles.
- Big Walk Co-op / Crossplay Not Working? FixesBig Walk co-op and crossplay troubleshooting: join codes, NAT, platform limits and the Reddit-famous disconnect fixes.